Welcome to our guide on how to build a compost bin for your organic gardening needs. Building a compost bin is a simple and effective way to enhance the health of your garden soil and promote sustainable gardening practices. By composting your organic waste, you can create nutrient-rich soil amendments that will benefit your plants and reduce your environmental impact.
In this article, we will explore various DIY options for constructing a compost bin using materials such as plastic trash cans, pallets, wire fences, and wood. With these easy-to-follow instructions, you’ll be able to create your own compost bin and start producing high-quality compost right in your backyard.
But before we dive into the building process, let’s take a quick look at the benefits of composting and how it can improve your gardening experience. By composting, you can recycle organic waste, reduce landfill usage, and decrease the need for chemical fertilizers. Compost enriches the soil with essential nutrients, improves its structure, and enhances water retention, creating optimal conditions for plant growth.
Whether you are an experienced gardener or just starting out, building a compost bin is a worthwhile investment for your organic gardening journey. So let’s get started and learn how to build your very own compost bin using simple and affordable materials.
Convert a plastic trash can into a composting bin
Looking for an easy and affordable way to build your own compost bin? Why not convert a plastic trash can into a composting bin? This DIY method is perfect for those with small spaces like porches or cramped yards. With just a few simple materials, you can transform a plastic trash can into a closed composting environment that allows for heat and moisture control.
Here’s what you’ll need:
- A plastic trash can with a tight closing lid
- A drill
- Aluminum screen fabric
- Silicone caulk or epoxy adhesive
Start by drilling holes in the bottom and sides of the trash can for ventilation. These holes will allow air to circulate within the compost and aid in decomposition. Make sure the holes are evenly spaced and not too large, as you don’t want vermin or pests to enter the bin.
Once the holes are drilled, cover them with aluminum screen fabric. This will prevent compost materials from falling out while still allowing air to flow through. Secure the screen fabric using silicone caulk or epoxy adhesive to ensure it stays in place.
Now, it’s time to start composting! Add a layer of organic matter such as fruit and vegetable scraps, coffee grounds, or yard waste. Remember to mix “green” materials (high in nitrogen) like kitchen scraps with “brown” materials (high in carbon) like dry leaves or shredded paper to maintain a balanced compost pile.
Place the lid on the trash can to keep out unwanted pests and helps trap heat and moisture inside. Regularly check the moisture levels and stir the compost pile to ensure proper decomposition. Within a few months, you’ll have nutrient-rich compost that you can use to nourish your plants and garden.
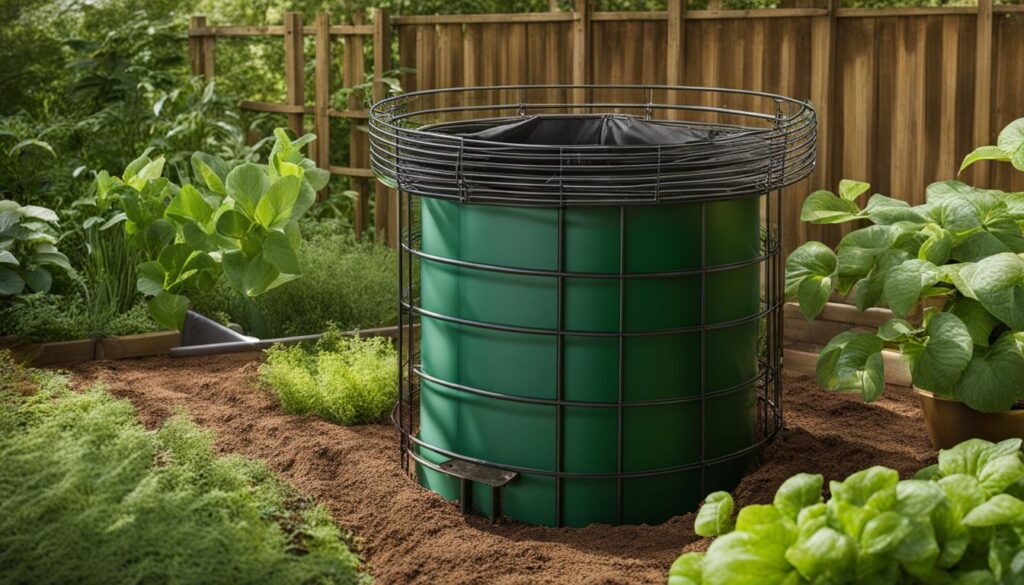
A plastic trash can converted into a composting bin. Image source: Unsplash
Build a DIY Compost Bin from Pallets
Pallets are a popular choice for building outdoor compost piles. Not only are they easy to find, but they also give your composting area a neat and organized appearance. Building a compost bin from pallets is a great option if you want to create a dedicated space for composting and keep your garden tidy.
To construct a pallet bin, you’ll need four wood pallets, a power drill, a screwdriver, L brackets, strap hinges, wood screws, a gate hook and latch, and gloves. These materials are easily accessible and affordable, making this DIY project budget-friendly.
Begin by laying two pallets side by side to form the back and front of the bin. Secure them together using L brackets and wood screws for stability. Then, attach the other two pallets to the sides, using the same method. Make sure to leave space between the slats for air circulation.
Once you’ve assembled the pallets, you can create a hinged door on one side of the bin using strap hinges. This door allows easy access for adding and turning the compost. Attach a gate hook and latch to keep the door securely closed.
When it comes to placing your pallet bin, choose a location in your garden that receives partial sunlight and is easily accessible. This will help ensure the composting process proceeds efficiently and that you can conveniently add new organic matter.
Now that your DIY compost bin from pallets is complete, you can start composting! Remember to layer your green and brown materials, turning the pile regularly to aerate it and speed up the decomposition process. Over time, the organic matter will break down, transforming into nutrient-rich compost that you can use to nourish your plants and garden.
Wire fence compost bin
A compost bin made of chicken wire is a quick and affordable option for collecting grass clippings, dry leaves, and yard waste. This DIY solution allows you to create a custom-shaped bin according to your preference, whether it be round or square. With the right materials and tools, you can easily construct a wire fence compost bin that is functional and efficient.
Gather Your Materials
To build a wire fence compost bin, you will need the following:
- Wire fencing
- Wire cutters
- Zip ties or wire
- Work gloves
Constructing the Bin
Start by measuring and cutting the wire fencing to the desired height and length for your compost bin. Use the wire cutters to trim the wire as needed. Next, connect the ends of the wire fence together using zip ties or wire, creating a secure enclosure. Make sure to wear work gloves to protect your hands during this process.
Position the wire fence bin in a suitable location in your garden or backyard. Ensure that it is easily accessible for adding and turning the compost. The open design of the wire fence allows for proper air circulation, which is crucial for the composting process.
Add organic materials such as kitchen scraps, grass clippings, dry leaves, and yard waste to the wire fence compost bin. It’s important to maintain a balance between green and brown materials in your compost pile to promote decomposition. Green materials include nitrogen-rich items like fruit and vegetable scraps, while brown materials consist of carbon-rich materials such as dry leaves.
Regularly turn the compost using a garden fork or shovel to mix the materials and help speed up decomposition. Water the compost pile occasionally, keeping it moist but not overly saturated.
Cold Composting
The wire fence compost bin is suitable for cold composting, which is a slower decomposition process. With cold composting, you allow organic matter to break down gradually over time without the need for temperature control or frequent turning. This method is ideal for those who are looking for a low-maintenance composting solution.
Remember, it’s important to be patient when composting. Depending on the materials used and the environmental conditions, it can take several months to a year for your compost to fully mature and be ready for use in the garden.
By following these simple steps, you can create a wire fence compost bin that fits your gardening needs. This DIY solution is not only cost-effective, but it also helps reduce waste and provides a sustainable way to nourish your plants with nutrient-rich compost.

Make a Wood Compost Bin
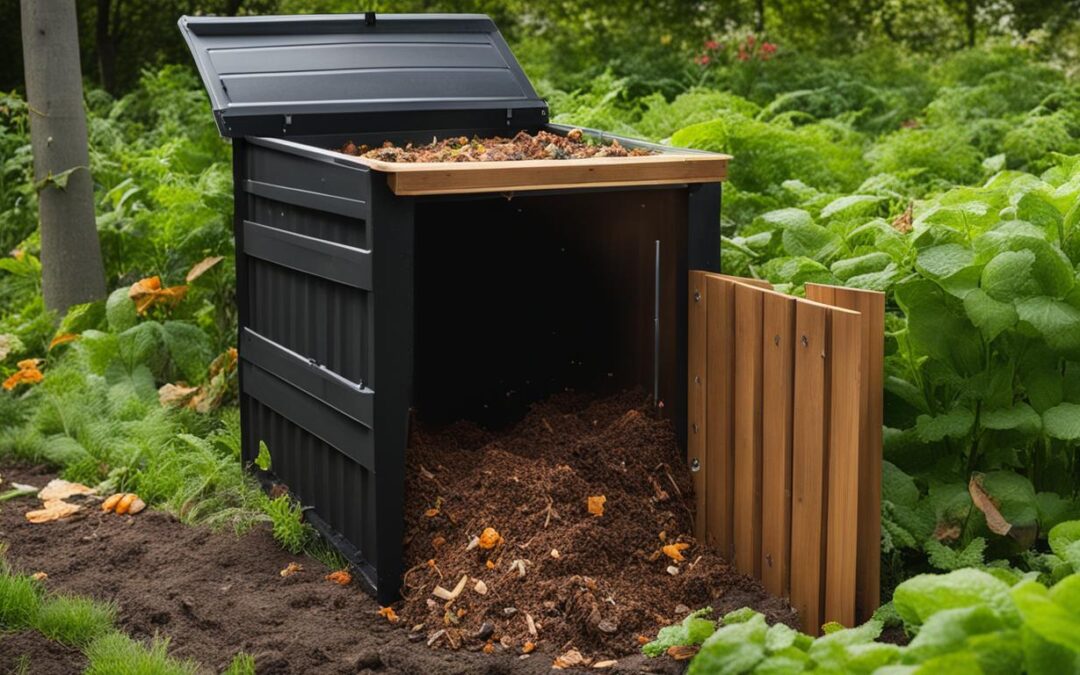
Wood compost bins are a popular choice for gardeners due to their durability and ease of assembly. By utilizing untreated wood, you can ensure that your compost bin is safe for organic gardening. Follow these simple steps to create your own wood compost bin using readily available materials and DIY techniques.
Materials You’ll Need
- 2×3 or 2×4 boards for the vertical supports
- 1×6 or 2×6 slats for the side panels
- A saw
- C-clamps to hold the pieces together
- An electric screwdriver
- Screws
Step-by-Step Instructions
1. Begin by cutting the boards and slats to the desired lengths, depending on the size of the compost bin you wish to create.
2. Lay the vertical boards on the ground, ensuring they are evenly spaced. Use the electric screwdriver and screws to attach them together, forming the frame of the compost bin.
3. Attach the slats to the sides of the frame using the C-clamps to hold them in place. Make sure the slats are securely fastened to create sturdy side panels.
4. Continue attaching slats until all sides of the compost bin are enclosed, leaving a small opening to easily access the compost.
5. Once the bin is assembled, position it in a convenient location in your garden or backyard.
6. Now, you can start composting by adding a mixture of green and brown materials, such as kitchen scraps, yard waste, and dry leaves, to the bin.
7. Remember to turn the compost regularly for proper aeration and decomposition.
By following these simple steps, you can create a sturdy wood compost bin that will allow you to efficiently compost your organic waste and produce nutrient-rich soil for your garden. Start your DIY project today and enjoy the benefits of sustainable gardening with your very own wood compost bin!
Easy homemade compost bin using a trash can
If you’re looking for a simple and affordable way to create a compost bin, why not repurpose a lidded, outdoor trash can? This DIY method is beginner-friendly and doesn’t require any special materials. All you need is a power drill and a paddle drill bit.
To transform your trash can into a compost bin, start by drilling holes in the can for air circulation. These holes will allow oxygen to reach the organic matter inside and help promote decomposition. Make sure to space the holes evenly around the can to ensure proper ventilation.
Once you have drilled the holes, secure the lid back on the trash can. The lid will help keep pests out and maintain the moisture levels in the compost. It’s important to strike a balance between air circulation and moisture retention.
Now that your homemade compost bin is ready, you can start adding your kitchen scraps, yard waste, and other organic materials. Remember to layer green and brown materials for optimal decomposition. Green materials include fruit and vegetable scraps, coffee grounds, and fresh cut grass, while brown materials consist of dry leaves, shredded paper, and sawdust.
By following this easy DIY method, you can turn a simple trash can into a functional compost bin for your garden. Not only will you be reducing waste, but you’ll also be producing nutrient-rich compost to nourish your plants. It’s a win-win for both your garden and the environment!
Tips for Successful Composting
Creating a successful compost pile requires a balanced mix of green and brown materials. Green materials are rich in nitrogen and include fruit and vegetable scraps, coffee grounds, and fresh cut grass. On the other hand, brown materials are high in carbon and consist of dry leaves, shredded paper, and sawdust. By combining these greens and browns, you provide the necessary ingredients for composting.
It’s crucial to maintain the right ratio of green and brown materials in your compost pile. Aim for a 3:1 or 4:1 ratio of browns to greens. This balance ensures proper decomposition and prevents the pile from becoming too wet or too dry. Remember, a compost pile that is too wet will become smelly and anaerobic, while a pile that is too dry will break down slowly.
Water and aeration are essential for the microorganisms that break down organic matter in the compost pile. Keep your compost pile moist, but not soggy, by regularly adding water. A good rule of thumb is to ensure the pile feels like a damp sponge. You can also periodically turn or aerate the pile with a pitchfork or shovel to provide oxygen to the microorganisms and facilitate decomposition.
Properly managing your compost pile by maintaining the right balance of green and brown materials, along with adequate moisture and aeration, will result in successful composting. With time and patience, you’ll be rewarded with nutrient-rich compost that you can use to nourish your garden and promote sustainable gardening practices.

Turning your compost pile
Turning your compost pile is an excellent way to enhance the decomposition process. It allows oxygen to reach the inner layers of the pile, helping microorganisms break down organic matter faster. Plan to turn your compost pile every 1-2 weeks, using a pitchfork or shovel to mix the outer and inner layers. This simple step will accelerate the composting process and help you achieve nutrient-rich compost more quickly.
The Benefits of Composting
Composting offers numerous benefits for gardeners. Not only does it help recycle organic waste, but it also reduces trash volume and decreases the need for chemical fertilizers. By composting, you can create nutrient-rich soil that enhances plant growth and promotes sustainable gardening practices.
One of the key advantages of composting is its ability to enrich the soil with essential nutrients. As organic matter breaks down, it releases nutrients such as nitrogen, phosphorus, and potassium, which are vital for plant health. These nutrients are slowly released into the soil, providing a steady supply of nourishment for your plants.
Furthermore, compost improves water retention in the soil, allowing plants to better withstand drought conditions. The organic matter in compost acts like a sponge, holding onto moisture and preventing it from evaporating quickly. This can help reduce the frequency of watering and conserve water resources.
In addition to its benefits for plants, composting also has a positive impact on the environment. By diverting organic waste from landfills, composting helps reduce methane gas emissions, which contribute to climate change. Moreover, composting reduces the need for synthetic fertilizers, which can leach into waterways and harm aquatic life.
Composting supports sustainable gardening practices by creating a closed-loop system. Instead of relying on chemical fertilizers that deplete natural resources, composting allows you to use organic waste to nourish your garden. This promotes a healthier ecosystem and minimizes the environmental impact of gardening.
Start composting today and reap the benefits of nutrient-rich soil, sustainable gardening, and a greener future!
How to Use Compost in Your Garden
Now that your compost is ready, it’s time to put it to work in your garden. Using compost is an excellent way to enrich your garden soil, providing essential nutrients, improving soil structure, and enhancing moisture retention. Follow these tips to make the most of your compost:
1. Apply compost as a top dressing: Spread a layer of compost on top of existing garden beds. This method is especially beneficial for established plants as it slowly releases nutrients into the soil, nourishing plant roots over time.
2. Incorporate compost into new soil: When planting new seedlings or creating new garden beds, mix compost into the soil to boost its fertility. This will provide a nutrient-rich environment for young plants to thrive.
3. Improve soil structure: Compost helps improve soil texture, making it more crumbly and friable. This allows roots to penetrate easily, promoting healthy plant growth.
4. Enhance moisture retention: Compost acts as a sponge, retaining water in the soil for longer periods. This reduces the need for frequent watering and helps plants withstand dry spells.
If you have a vegetable garden, incorporating compost is crucial for the successful growth of your crops. Vegetables require a nutrient-rich soil to produce abundant and healthy harvests. By regularly applying compost and following the tips mentioned above, you can create a fertile garden bed that provides the necessary nutrients for your plants.
Remember, composting is a sustainable gardening practice that reduces waste, enriches the soil, and promotes a healthier ecosystem. By using compost in your garden, you not only nurture your plants but also contribute to a more sustainable and environmentally friendly approach to gardening.
Tips for making compost tea
Compost tea is a powerful and natural fertilizer that can significantly enhance plant growth and provide essential nutrients for your garden. It is made by steeping compost in water to extract the beneficial microorganisms and nutrients present in the compost. Here are some tips to help you make compost tea effectively:
1. Choose quality compost: The success of your compost tea depends on the quality of the compost you use. Ensure that your compost is well-aged, dark, and rich in organic matter. Avoid using compost that has not fully decomposed, as it may contain harmful pathogens.
2. Brewing process: To make compost tea, place a generous amount of compost in a mesh bag or a loosely tied piece of cloth and immerse it in a container of water. Let it steep for 24 to 48 hours, stirring occasionally to promote aeration and microbial activity. This brewing process allows the beneficial microbes and nutrients to be released into the water.
3. Application: After the steeping period, remove the compost bag or cloth from the container and strain the liquid to remove any solid particles. Dilute the compost tea with water until it appears light brown and has a mild earthy smell. You can then apply the compost tea directly to the soil around your plants or use it as a foliar spray, ensuring the leaves are thoroughly coated. This will provide your plants with a concentrated dose of natural fertilizer, supporting their growth and overall health.
Incorporating compost tea into your gardening routine can greatly benefit your plants and help you achieve a thriving and sustainable garden. By following these tips, you can harness the power of compost tea to promote plant growth, improve soil fertility, and reduce the need for synthetic fertilizers.

